By the NVN Marine Expert Team — Our team has spent 10+ years on the water installing, testing, and troubleshooting marine electronics from the Gulf Coast to the Great Lakes. We're authorized resellers for every brand we review, and we only recommend gear we'd trust on our own boats.
A new chartplotter sitting in the box on your garage floor is the easy part. Getting it mounted at the helm, wired without a voltage drop, talking to your NMEA 2000 network, and holding a GPS lock under a T-top — that's where most center console installs go sideways. We've done this enough times, on everything from a 19-foot bay boat to a 32-foot offshore center console, to know exactly where people get stuck.
The good news: a chartplotter install on a center console is one of the most DIY-friendly jobs on the boat. You don't need to pull the deck or drop the motor. With a weekend, a few specific tools, and a little patience around the dash cutout, you can do a clean job that looks factory and survives years of salt spray. This guide walks you through the whole thing — mounting, power, networking, GPS, and the mistakes that bite people.
Before You Cut Anything: Plan the Helm
The single most expensive mistake on a center console install is cutting the dash hole in the wrong spot. Gelcoat doesn't forgive. So before the hole saw comes out, sit in the driver's seat the way you actually run the boat.
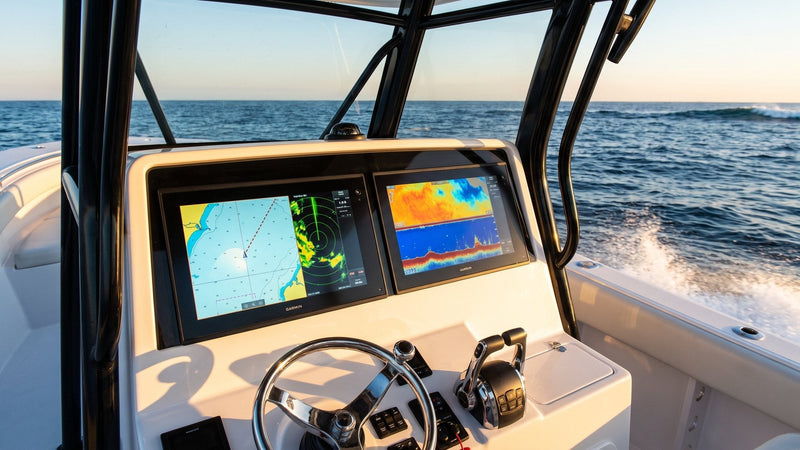
Three things matter here. First, sightline — you want the screen visible without dropping your eyes off the water, ideally just below the windshield or the lower edge of a hardtop. Second, reach — your hand should fall on the bezel and SD card slot without leaning. Third, clearance behind the dash. This is the one people forget. A 9-inch multifunction display needs four to six inches of depth behind the dash for the connector block and the bend radius of the cables. On a lot of center consoles the dash is packed with the wiring harness, the gauge backs, and a stereo. Reach back there with your hand before you commit.
If you're running a flush mount, check that the dash is flat and rigid where you're cutting. A thin, unsupported fiberglass panel will flex when you tighten the screws and crack the gelcoat around the bezel six months later. We add a fiberglass or starboard backing plate behind any flush mount on a flexible dash. It's ten minutes of work that prevents a stress crack you can't un-see.
Flush Mount vs. Trunnion Bracket
You've got two ways to mount the display, and on a center console either can be right.
Flush mount cuts the screen into the dash for that clean, built-in look. It's the better choice if your dash has the real estate and the unit ships with a flush-mount kit (most 7-inch and up units do). Downside: it's permanent, the cutout is unforgiving, and you lose the ability to tilt the screen.
Trunnion (bracket) mount clamps the display in a gimbal bracket you screw to the top of the dash or an overhead pod. Faster to install, lets you tilt for glare, and you can pull the unit for storage or to swap boats. The tradeoff is it sits proud of the dash and can vibrate at speed if the bracket isn't snugged down. For smaller center consoles with a tight dash, or anyone who trailers and wants to remove the electronics, the bracket wins.
Tools and Materials You'll Actually Need
Here's the real list — not the aspirational one.
| Item | Why You Need It | Rough 2026 Cost |
|---|---|---|
| Hole saw + jigsaw (fine metal blade) | Round corners and straight cuts in fiberglass | $35–60 |
| Marine sealant (Dow 795 or butyl tape) | Bed the bezel, keep water out | $14–22 |
| Heat-shrink crimp connectors + crimper | Corrosion-proof power connections | $30–45 |
| Inline fuse holder + ATC fuse | Protect the power run (size per manual) | $8–12 |
| Tinned marine wire (matching gauge) | Power extension if needed | $0.80–1.50/ft |
| NMEA 2000 starter kit (backbone, tees, terminators) | Network backbone | $95–130 |
| Dielectric grease | Connector protection | $9 |
| Painter's tape + marker | Mark the cutout cleanly | $6 |
One note on sealant: do not use 3M 5200 to bed your display bezel. It's a permanent adhesive, and the day you need to pull that unit you'll be cursing us. Use a removable marine sealant like Dow 795 or, our preference for displays, butyl tape. It seals, it stays pliable, and it lets you remove the unit later without a putty knife and a prayer.
Cutting the Dash
Tape off the area first — painter's tape over the cut line protects the gelcoat from the jigsaw shoe and gives you a clean surface to mark on. Most units include a paper cutout template. Tape it down, check it twice against your sightline plan, then mark.
Drill the corner radius holes first with the hole saw or a spade bit sized to the template's corner. Then connect them with the jigsaw running a fine-tooth metal blade — slow and steady. Fiberglass chips if you rush it. Wear a respirator; fiberglass dust is nasty. Dry-fit the unit before you wire anything. The bezel should sit flat with no rocking. If it rocks, the dash isn't flat and you want that backing plate.

Wiring the Power — Where Most Installs Go Wrong
A chartplotter draws more than people expect. A 9-inch unit pulls roughly 1.5 to 2.5 amps at full brightness; a 12- or 16-inch glass-bridge display can pull 3 to 4. That's not a lot, but the killer on a center console is wire run length. The helm can be 15 to 20 feet of wire from the battery or distribution panel, and undersized wire over that distance causes voltage drop. The unit browns out, reboots randomly, or won't hold a GPS fix at idle when the alternator isn't charging.
Run power to a switched source — a dedicated breaker on your electronics panel is ideal, so the plotter powers up with the rest of your nav gear and isn't drawing when the boat's on the trailer. Keep the inline fuse within a few inches of the positive source, and size it per the manual (typically 5 to 7.5 amps for a 9-inch unit). If your factory power leads are too short to reach the panel, extend with tinned marine wire one gauge heavier than the factory lead, and crimp with heat-shrink connectors. Solder-and-tape connections corrode in a salt environment within a season or two. We've pulled apart enough green, crumbling butt connectors to never trust electrical tape on a boat again.
Leave a drip loop in every cable behind the dash — a downward bend before the wire enters the connector — so water tracking down the cable drips off instead of running into the back of the unit. And hit every connector with dielectric grease before you mate it. Salt air finds bare copper fast.
Building the NMEA 2000 Backbone
This is the part that separates a chartplotter from a nav system. NMEA 2000 is the network that lets your plotter talk to your engine, your transducer module, your VHF with GPS, your autopilot, and your sensors. Get it right and everything just shows up on the screen. Get it wrong and you'll chase ghost faults for weeks.
The rules are simple but non-negotiable:
- The backbone is the spine. Devices connect to it through tee connectors and drop cables.
- You need exactly two 120-ohm terminating resistors — one at each end of the backbone. Not one. Not three. Two.
- The network needs one power node, fed through a tee with a fused 12V connection, ideally near the middle of the backbone for even voltage distribution.
- Drop cables max out at 6 meters each; the total backbone length tops out around 100 meters for standard "light" cable. On a center console you're nowhere near that limit, but keep drops short.
If you're starting from scratch, a NMEA 2000 starter kit gives you a backbone cable, a power tee, two terminators, and a few tees — enough for most center console builds. Add tees as you add devices. We've covered the full networking process in depth in our guide on how to network marine electronics with NMEA 2000, and it's worth reading before you start plugging things together.
The most common failure we see? Two power feeds on one backbone, or a missing terminator. Both throw the bus voltage off and cause devices to drop on and off the network. If your engine data flickers in and out, count your terminators first.
GPS: Internal Antenna or External?
Every modern chartplotter — the Raymarine Axiom line, Garmin GPSMAP, Simrad NSS evo3S, Lowrance HDS Pro — has a built-in GPS receiver, and on an open center console with a clear view of the sky, the internal antenna is usually all you need. It'll lock fast and hold position fine.
The exception, and it's a big one on center consoles: a hardtop, T-top, or tower. Carbon fiber, aluminum, and the wiring bundled into a hardtop can block or reflect satellite signal, and you'll see your position wander or drop at the worst time. If your display sits under metal, run an external GPS antenna — a Raymarine RS150, Garmin GA38, or the equivalent for your brand — and mount it up top with a clear view of the sky. It connects to the NMEA 2000 backbone or directly to the display depending on the model. We default to an external antenna on any boat with a hardtop. It's a $130–180 insurance policy against the one day your GPS quits offshore.
Comparing Popular Center Console Chartplotters
If you're still choosing the unit, here's how the favorites stack up for a center console install. All prices are 2026 estimates and reflect typical 9-inch configurations.
| Chartplotter | Screen | Built-in Sonar | Est. 2026 Price | Best For |
|---|---|---|---|---|
| Raymarine Axiom+ 9 | 9" IPS touch | RealVision 3D | ~$1,319 | All-around helm |
| Raymarine Axiom 2 Pro 9 RVM | 9" HybridTouch | 1kW + RealVision | ~$3,354 | Offshore, harsh sun |
| Garmin GPSMAP 943xsv | 9" touch | CHIRP + ClearVü/SideVü | ~$1,599 | Garmin value pick |
| Simrad NSS evo3S 9 | 9" touch | CHIRP + ActiveImaging | ~$2,149 | Networked nav + radar |
| Lowrance HDS Pro 9 | 9" touch + keypad | ActiveTarget ready | ~$1,899 | Serious anglers |
Our honest take for most center console owners running inshore and nearshore: the Raymarine Axiom+ 9 hits the sweet spot of screen quality, ease of install, and price. If you fish offshore and want the brighter screen and 1kW sonar, step up to the Axiom 2 Pro, or go bigger with the Raymarine Axiom 12. Garmin's GPSMAP 943xsv is the value play if you're already in the Garmin world.
Questions to Ask Before You Buy and Install
A few questions save a lot of grief. How thick is your dash, and is it flat where you want to mount? Do you already have a NMEA 2000 backbone, or are you building one from zero? Is there a hardtop or T-top over the helm that'll need an external GPS antenna? What's the wire run from your electronics panel to the helm — and is the factory power lead long enough? Do you want to integrate sonar now, meaning you'll also be running a transducer, or is this nav-only for now? Answer those five and you'll know exactly what to order alongside the display.
The Bottom Line
A chartplotter install on a center console comes down to four things done right: cut the dash carefully, run properly sized fused power, build the NMEA 2000 backbone with exactly two terminators and one power node, and put a real GPS antenna up top if you've got a hardtop. Nail those and you've got a system that boots reliably, reads your engine and sensors, and holds a fix offshore. Skip any one and you'll be back behind the dash with a flashlight.
If you'd rather not cut your own dash, that's a valid call too — a marine electronics installer will do the helm in a few hours, and the unit you buy from us comes with the same warranty either way. But this is genuinely a job a careful boat owner can do well in a weekend.
👉 Shop All Chartplotters & GPS at NVN Marine →
Frequently Asked Questions
How long does it take to install a chartplotter on a center console?
For a competent DIYer, plan on a full afternoon to a weekend. The dash cutout and dry-fit take about an hour if you're careful. Power wiring is another hour or two depending on the run. Building or tying into a NMEA 2000 backbone adds time if you're starting from scratch. Most people finish a clean single-display install in four to six hours.
Do I need to cut a hole in my dash, or can I bracket-mount?
You have both options. A trunnion bracket mount screws to the top of the dash with no cutout and lets you tilt and remove the unit — ideal for trailered boats or tight dashes. A flush mount cuts the screen into the dash for a built-in look but is permanent. If you're not confident cutting fiberglass, the bracket mount is the safer first install.
What size wire and fuse do I need for a 9-inch chartplotter?
A 9-inch unit typically draws 1.5 to 2.5 amps, but over a 15–20 foot run from the helm to the panel you should use heavier wire than the factory lead — usually 14 or 12 AWG tinned — to avoid voltage drop. Fuse it per the manual, generally 5 to 7.5 amps, with the inline fuse mounted within a few inches of the positive source.
Why does my chartplotter lose GPS signal under my T-top?
A metal or carbon hardtop, T-top, or tower can block and reflect satellite signal, causing your position to wander or drop. The fix is an external GPS antenna mounted on top of the hardtop with a clear view of the sky, connected to your display or NMEA 2000 backbone. We recommend this on any center console with overhead structure.
How many terminators does a NMEA 2000 network need?
Exactly two — one 120-ohm terminating resistor at each end of the backbone, and no more. The network also needs one power node fed through a fused tee. Missing a terminator, doubling up, or running two power feeds are the most common causes of devices dropping on and off the network.
Can I install a chartplotter and fish finder in one unit?
Yes — most modern chartplotters are multifunction displays that combine GPS navigation and sonar in one screen. You'll run a transducer to the unit in addition to power and the NMEA 2000 connection. If you want sonar, choose a combo unit like the Garmin GPSMAP 943xsv or Raymarine Axiom and plan your transducer install at the same time. See our marine transducer buyer's guide to match the right transducer to your unit.